The first time I smoked pork shoulder, I kept lifting the lid to check on it. Every peek let heat escape, and dinner landed hours later than planned. I learned the lesson the hungry way: this cut rewards steady heat and patience more than constant attention. Pork shoulder is forgiving, affordable, and a fine place to start if you want real barbecue without buying a truckload of gear. A kettle grill, pellet cooker, or basic offset can all get you there. Low and slow, and don't overthink it.
Pick the right cut and plan your timing
At the store, you’ll usually see Boston butt, picnic shoulder, or a whole shoulder. Despite the name, Boston butt comes from the upper shoulder and is the easiest choice for pulled pork: it has plenty of fat and connective tissue to soften during a long cook. A picnic shoulder comes from lower down the leg, often has skin, and can be a little trickier to pull evenly. Either works, but for a first smoke, choose a bone-in Boston butt around 7 to 9 pounds.
Plan roughly 1½ hours per pound as a loose scheduling estimate, not a promise. A 8-pound pork shoulder might take 10 to 14 hours, depending on the cooker, weather, and how often you open the lid. Start earlier than you think you need to. Cooked meat can rest wrapped in a warm cooler for a couple of hours, but you can’t make a stubborn roast finish on command. Build in a buffer, especially if the family is waiting on dinner.

Trim, season, and get the cooker ready
Trim any thick, hard fat that won’t render, but don’t carve the roast bare. Leave about a quarter inch of softer fat where practical; it helps protect the surface during a long cook. Pat the meat dry, then apply a thin coat of yellow mustard or neutral oil if you want a binder. It helps seasoning stick, but it won’t make the finished pork taste like mustard.
For a simple rub, combine kosher salt, black pepper, paprika, brown sugar, and a little garlic powder. There’s no magic ratio. Use enough to coat the outside evenly without piling it into a crusty blanket. If you season the night before, refrigerate the roast uncovered on a tray; otherwise, seasoning it while the cooker heats is perfectly fine.
Set up for indirect heat and aim for a cooker temperature between 250°F and 275°F. That range cooks efficiently while still giving the meat time to pick up smoke. For wood, use a few chunks of oak, apple, or cherry rather than trying to fill the cooker with smoke. Clean, light smoke is what you want; thick white smoke can leave a bitter flavor. Put a drip pan underneath if your setup allows it, and give the meat room for air to circulate.
Smoke by feel, not by the clock
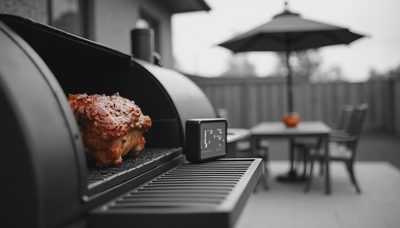
Place the pork shoulder on the cooker with the fat cap facing the heat if one side runs hotter. Insert a leave-in thermometer into the thickest section without touching the bone. Keep the lid closed as much as you can. You can spritz the surface with water or apple juice if it looks dry, but frequent spritzing slows the cook, so I usually leave it alone for the first few hours.
The internal temperature will climb, then slow down somewhere around stall territory, often in the 150°F to 170°F range. That pause is normal: moisture evaporating from the surface cools the meat while the connective tissue is still breaking down. It does not mean your fire has failed. You can wait it out, or wrap the pork shoulder in unwaxed butcher paper or foil once the bark looks dark and set. Foil usually speeds things up more; paper lets a little more surface texture remain.

Know when it is tender, then rest it
Temperature is a useful guide, not the finish line by itself. Start checking for tenderness when the thickest part reaches about 195°F. Slide a probe into several spots; the meat is ready when it goes in with little resistance, often between 195°F and 205°F. If it still feels tight, keep cooking and check again in 20 to 30 minutes. A pork shoulder can be safely cooked to a lower temperature, but pulled pork needs more time for connective tissue to soften.
Once it passes the tenderness test, take it off the heat and keep it wrapped. Rest it for at least 45 minutes, or longer in an insulated cooler with clean towels around the package. Resting lets the juices settle and gives you room to handle a cook that finished early. Don’t put hot meat straight into a sealed cooler for half the day; keep it hot and serve within a sensible window. If you need to hold it longer, use a food-safe method that maintains a safe temperature.
Pull, sauce, and serve the good parts
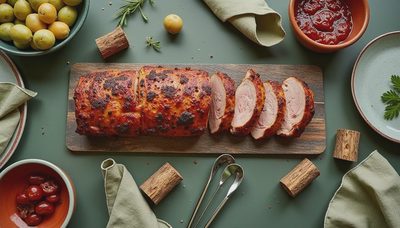
Unwrap the roast over a tray to catch the juices. Remove the bone and any large pieces of unrendered fat, then pull the meat into strands with forks or clean gloved hands. Mix some of the collected juices back in, tasting as you go. Add sauce at the table or fold in just enough to coat the pork; drowning it can hide the smoke and seasoning you worked for.
For a Kansas City-style plate, serve it on buns with slaw and pickles, or alongside beans and cornbread. The bark—the dark, seasoned exterior—is the cook’s reward, so chop some into the pulled meat instead of leaving it on the cutting board. A 8-pound raw pork shoulder usually feeds a crowd, but bone, trimming, and appetites affect the final yield. Make extra if you want leftovers for tacos, nachos, or breakfast hash.
Fix the common problems and save leftovers
Dry, tough pork usually needs more cooking, not less. If the probe meets resistance, return the roast to the cooker and give it time. Pale bark often means the cooker ran cool, the meat was wrapped too soon, or the surface stayed wet from repeated spritzing. Next time, wait for a darker crust before wrapping and keep the lid shut. If the outside gets too dark before the center softens, wrap it and continue at the same steady heat.
Refrigerate leftovers within two hours in shallow containers so they cool quickly. Keep them for three to four days, or freeze portions for an easy later meal. Reheat gently with a splash of broth or reserved juices to keep the strands moist. Once you’ve cooked pork shoulder this way, the process becomes less mysterious: choose a good cut, hold a steady fire, check for tenderness, and give it a proper rest. Your first cook doesn’t need to be perfect. It just needs enough time.


No letters yet — be the first to write.